Quick start with FaunaDB
This section helps you to get up and running with your first FaunaDB database using the FaunaDB Shell, in only 5 minutes!
| FaunaDB is free to use, up to a generous quantity of read or write operations, data transfer, and storage. If you exceed the free limits, pricing is very reasonable. See our Pricing page for details. |
Sign up for a FaunaDB account
Create a FaunaDB account for yourself, so that you can create databases, create data within those databases, and query that data.
-
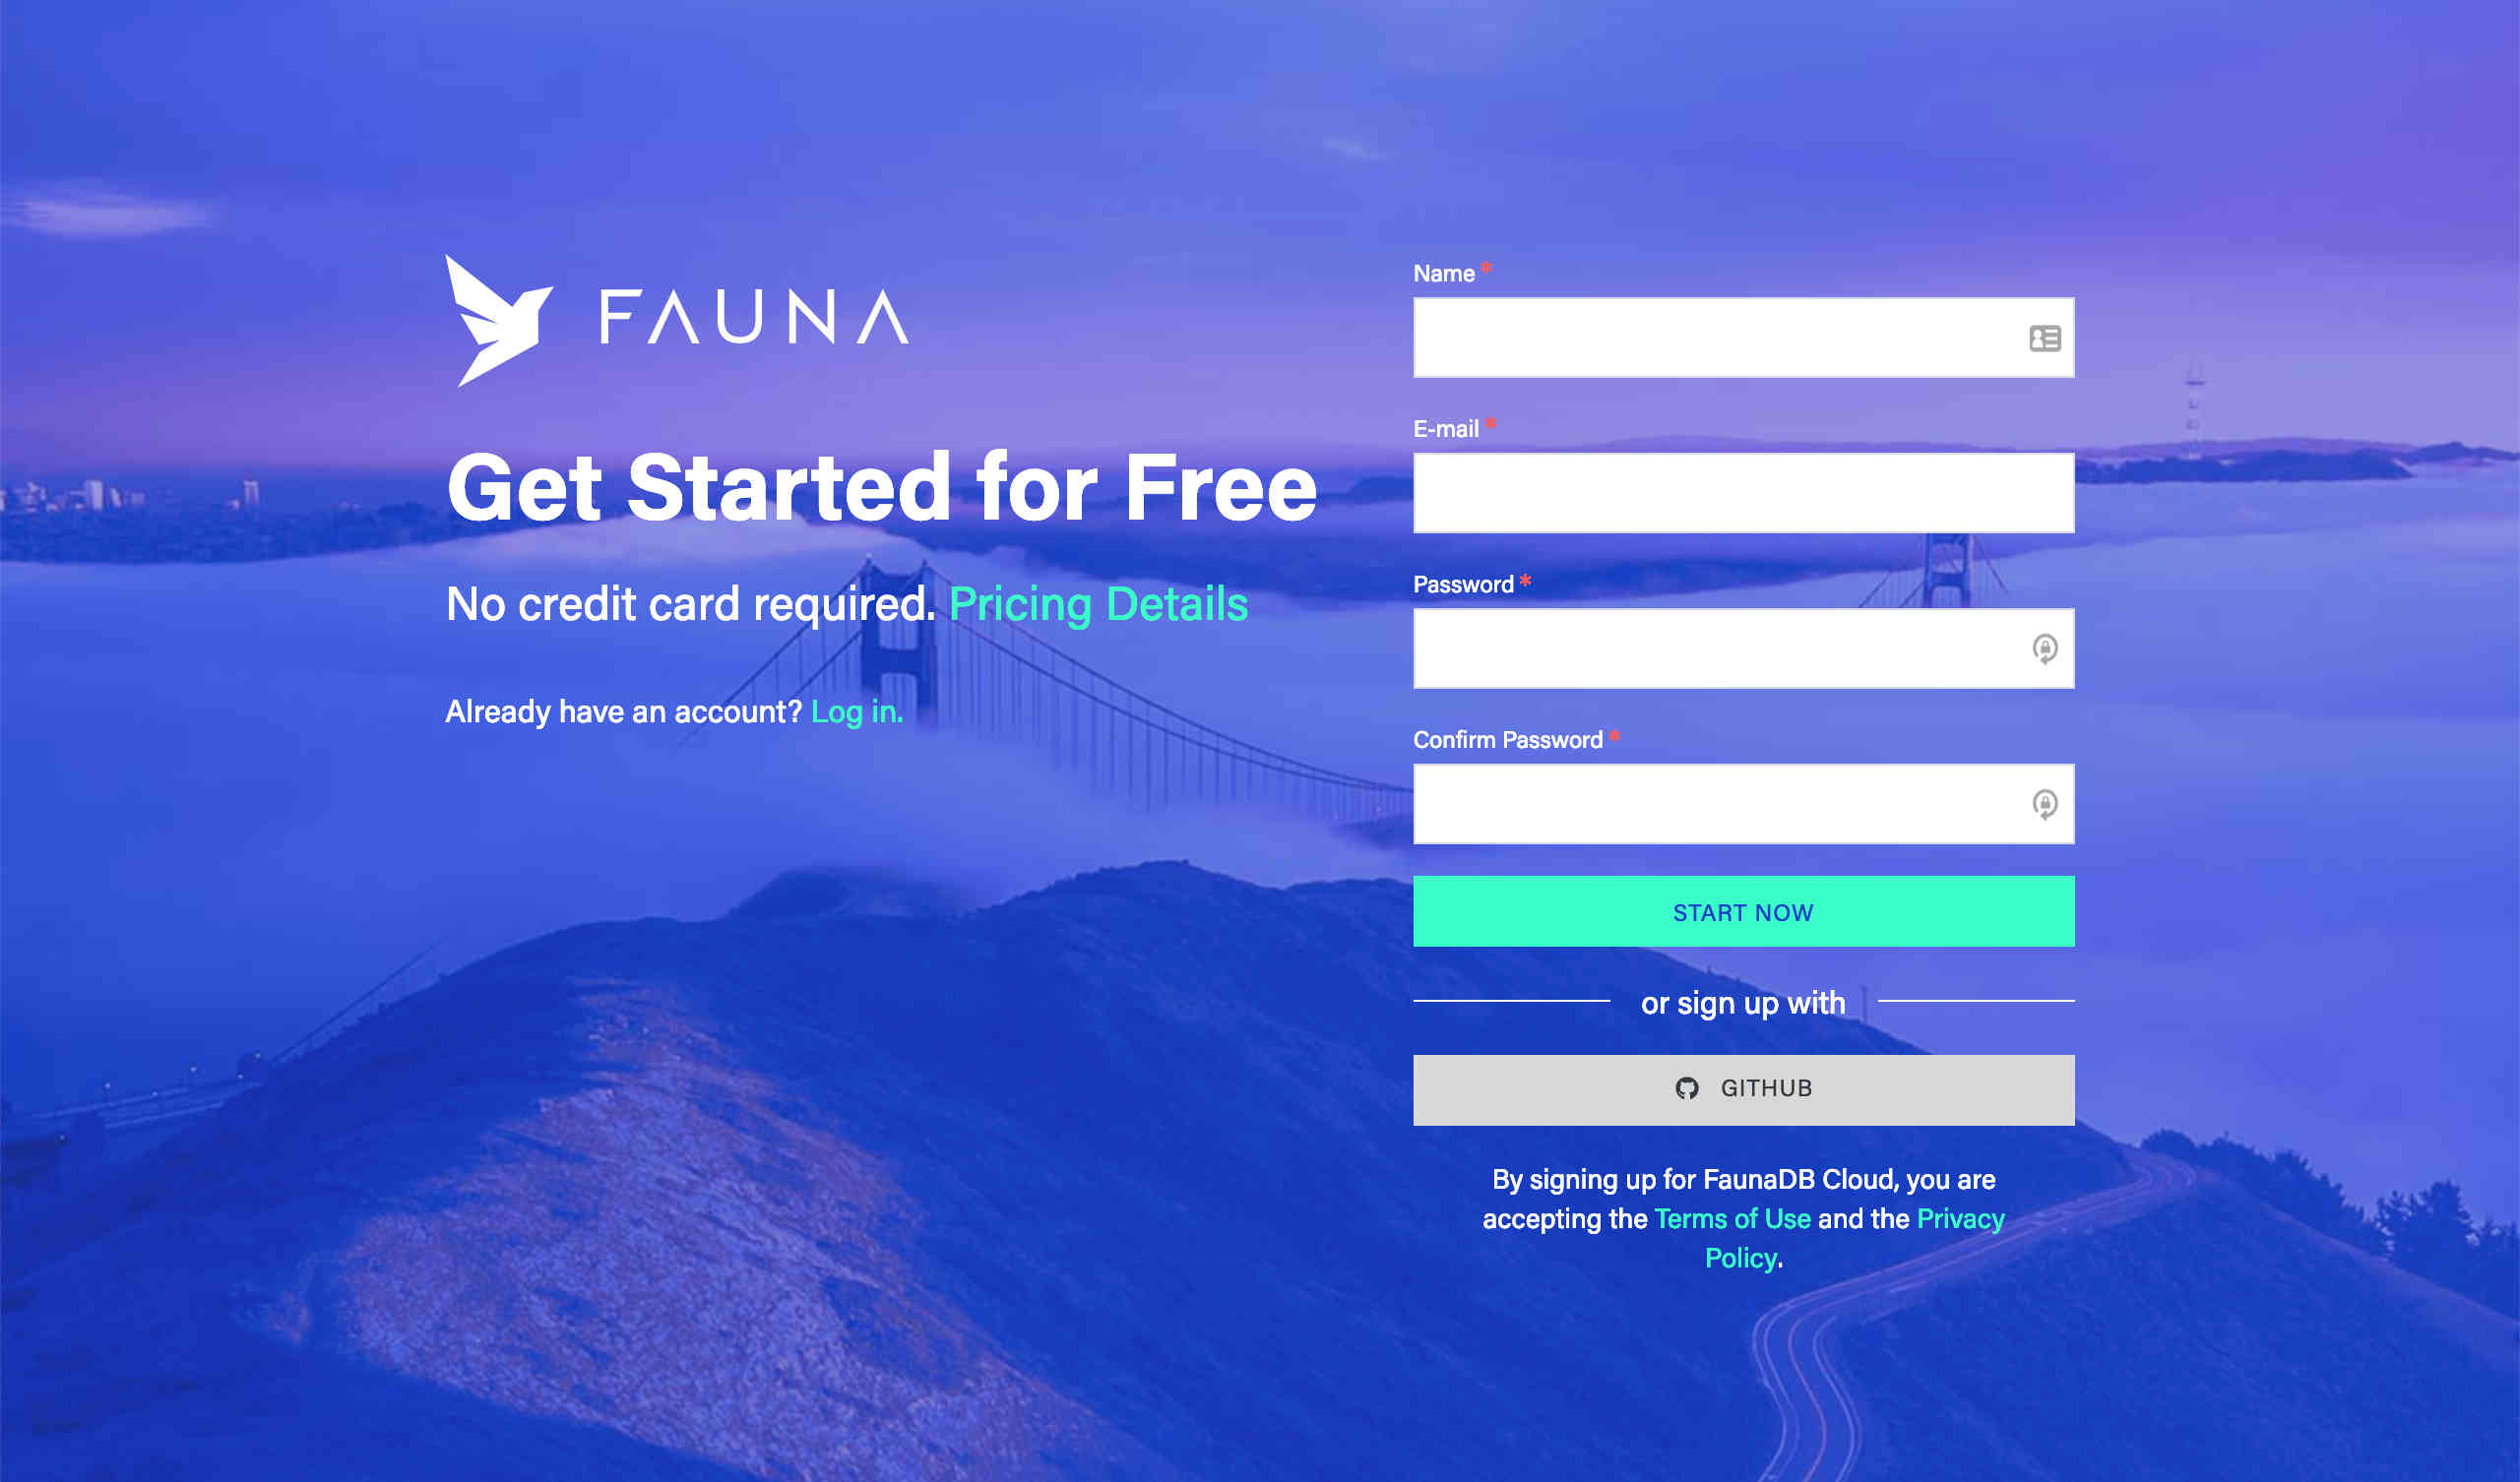
Visit https://dashboard.fauna.com/accounts/register. The Sign Up screen appears:
-
To sign up, you can either fill in your information and click Start Now, or click either the GitHub or Netlify button to sign up. It’s quick and easy!
Sign up is now complete.
| FaunaDB is free to use, until you exceed storage, traffic, or daily operation counts. See Pricing for details. |
Install FaunaDB Shell
Once you have your account setup, open a terminal and install the FaunaDB Shell. If you are on a PC, you can use:
Login to your FaunaDB account
|
FaunaDB Shell does not currently support GitHub or Netlify logins. If you signed up for FaunaDB using your GitHub or Netlify credentials, follow these steps, then continue with Start using your database. Until FaunaDB Shell supports GitHub or Netlify logins, you can use the Shell included in the Console interface to run the queries presented in this tutorial. |
Once the FaunaDB Shell is installed, it’s time to login to your FaunaDB account from the shell. You can do that by running the following command:
fauna cloud-loginYou are prompted for your FaunaDB credentials, where you need to enter the email you used for signing up, and your password. Visit this link if you forgot your password.
Email: email@example.com
Password: **********
Once you are logged in on a machine, the FaunaDB Shell remembers your
credentials (in the $HOME/.fauna-shell configuration file) so you
shouldn’t need to log in again.
Create a database
Now we can create database to store our data. Run the following command
for creating a database called my_db:
fauna create-database my_dbStart using your database
Now we can open a shell to start using our new database:
fauna shell my_dbIf all went well, you should see the following prompt:
Starting shell for database my_app
Connected to https://db.fauna.com
Type Ctrl+D or .exit to exit the shell
Once in the shell, we can start by creating a collection:
CreateCollection({ name: "posts" })FaunaDB stores data in the form of nested document object. Each document belongs to a specific collection. So in order to create a document for a blog post, we need to first create a posts collection.
The shell displays the result of our query, in this case our newly created collection:
{ ref: Collection("posts"),
  ts: 1533753878043481,
  history_days: 30,
  name: "posts" }
Next, we can create an index to easily retrieve blog posts by title:
CreateIndex({
  name: "posts_by_title",
  source: Collection("posts"),
  terms: [{ field: ["data", "title"] }]
})
And the result should be the index instance:
{ ref: Index("posts_by_title"),
  ts: 1533753979163761,
  active: true,
  partitions: 1,
  name: "posts_by_title",
  source: Collection("posts"),
  terms: [ { field: [ "data", "title" ] } ] }
Add data and query your database
Now that we’ve prepared our schema, let’s create our first blog post:
Create(
  Collection("posts"),
  { data: { title: "What I had for breakfast .." } }
)
{ ref: Ref(Collection("posts"), "207089183860195845"),
ts: 1533754485757944,
data: { title: "What I had for breakfast .." } }We can also create multiple blog posts at once by using the Map function:
Map(
  [
    "My cat and other marvels",
    "Pondering during a commute",
    "Deep meanings in a latte"
  ],
  Lambda("post_title",
    Create(
      Collection("posts"), { data: { title: Var("post_title") } }
    )
  )
)
Here we call Map with an array of posts, and a Lambda (an anonymous
function) that accepts one parameter "post_title". "post_title" is
used inside the Lambda as the title field of the data we want to
insert. This is the result:
[ { ref: Ref(Collection("posts"), "207089200754854408"),
    ts: 1533754501878440,
    data: { title: "My cat and other marvels" } },
  { ref: Ref(Collection("posts"), "207089200754853384"),
    ts: 1533754501878440,
    data: { title: "Pondering during a commute" } },
  { ref: Ref(Collection("posts"), "207089200754852360"),
    ts: 1533754501878440,
    data: { title: "Deep meanings in a latte" } } ]
Now we can retrieve our posts by ID.
| The IDs presented above will be different from the IDs that you obtain. To run queries involving IDs, you need to replace the IDs presented in this tutorial with one of the IDs that you obtained in the previous step. |
When we run the following query:
Get(Ref(Collection("posts"), "207089200754852360"))The result should be similar to:
{ ref: Ref(Collection("posts"), "207089200754852360"),
  ts: 1533754501878440,
  data: { title: "Deep meanings in a latte" } }
You can replace the ID (207089200754852360) with one of the IDs that
you obtained, to fetch a different document instead.
Or, better yet, retrieve by post title using our index:
Get(
  Match(
    Index("posts_by_title"),
    "My cat and other marvels"
  )
)
Where we get back:
{ ref: Ref(Collection("posts"), "207089200754854408"),
  ts: 1533754501878440,
  data: { title: "My cat and other marvels" } }
And just like that, we have just queried our first FaunaDB database!
One last thing: to exit the Shell, you can type .exit and then press
Return, or type Control+D:
.exit
09:56 $Next steps
-
FaunaDB Shell documentation
-
Query a Ledger blog post.
Was this article helpful?
We're sorry to hear that.
Tell us how we can improve!
documentation@fauna.com
Thank you for your feedback!